Start here
Install the Windows engine
Use the Windows desktop engine for lower recording delay and better audio-interface playback.
Steps
- 1
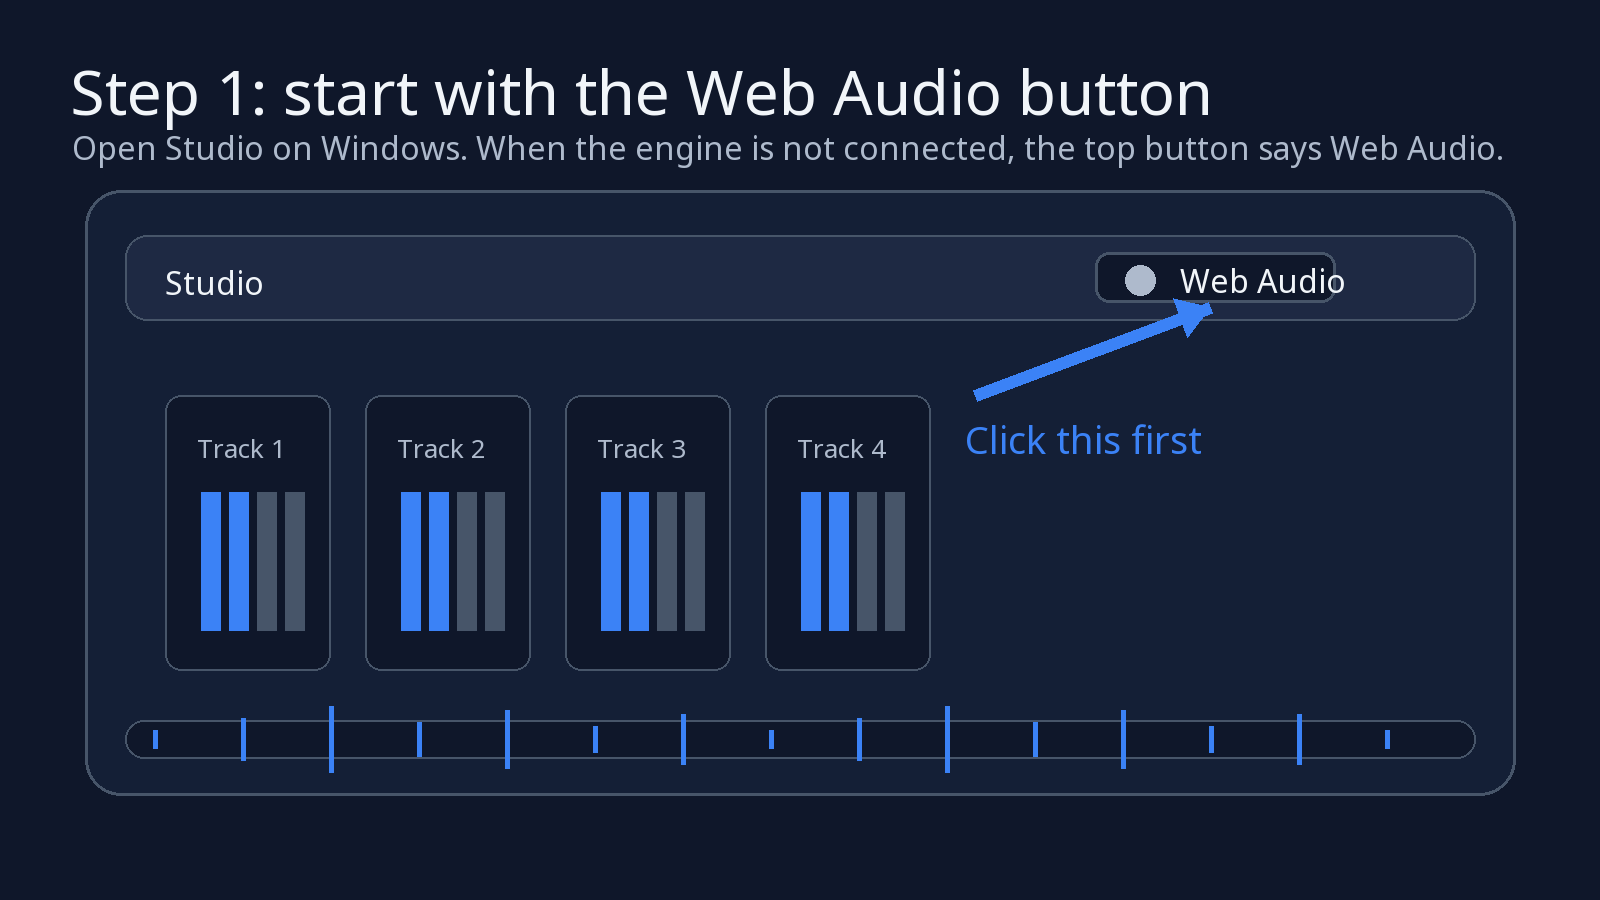
On your Windows computer, open Studio or Writing Room and click the Web Audio button in the top bar.
- 2
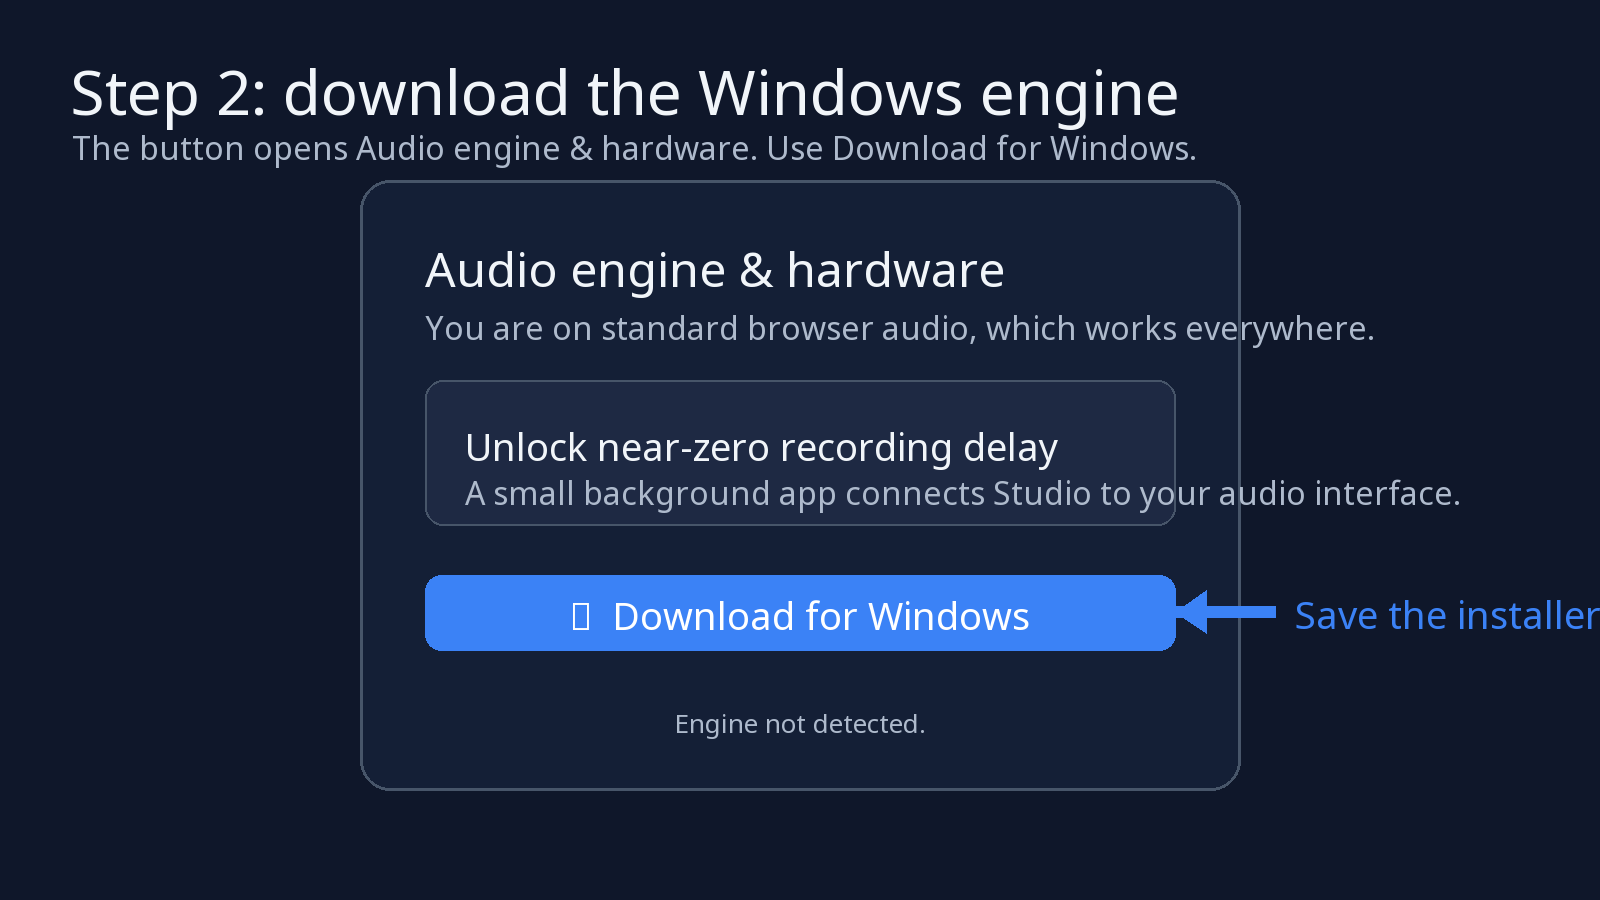
In Audio engine & hardware, press Download for Windows and save the installer.
- 3
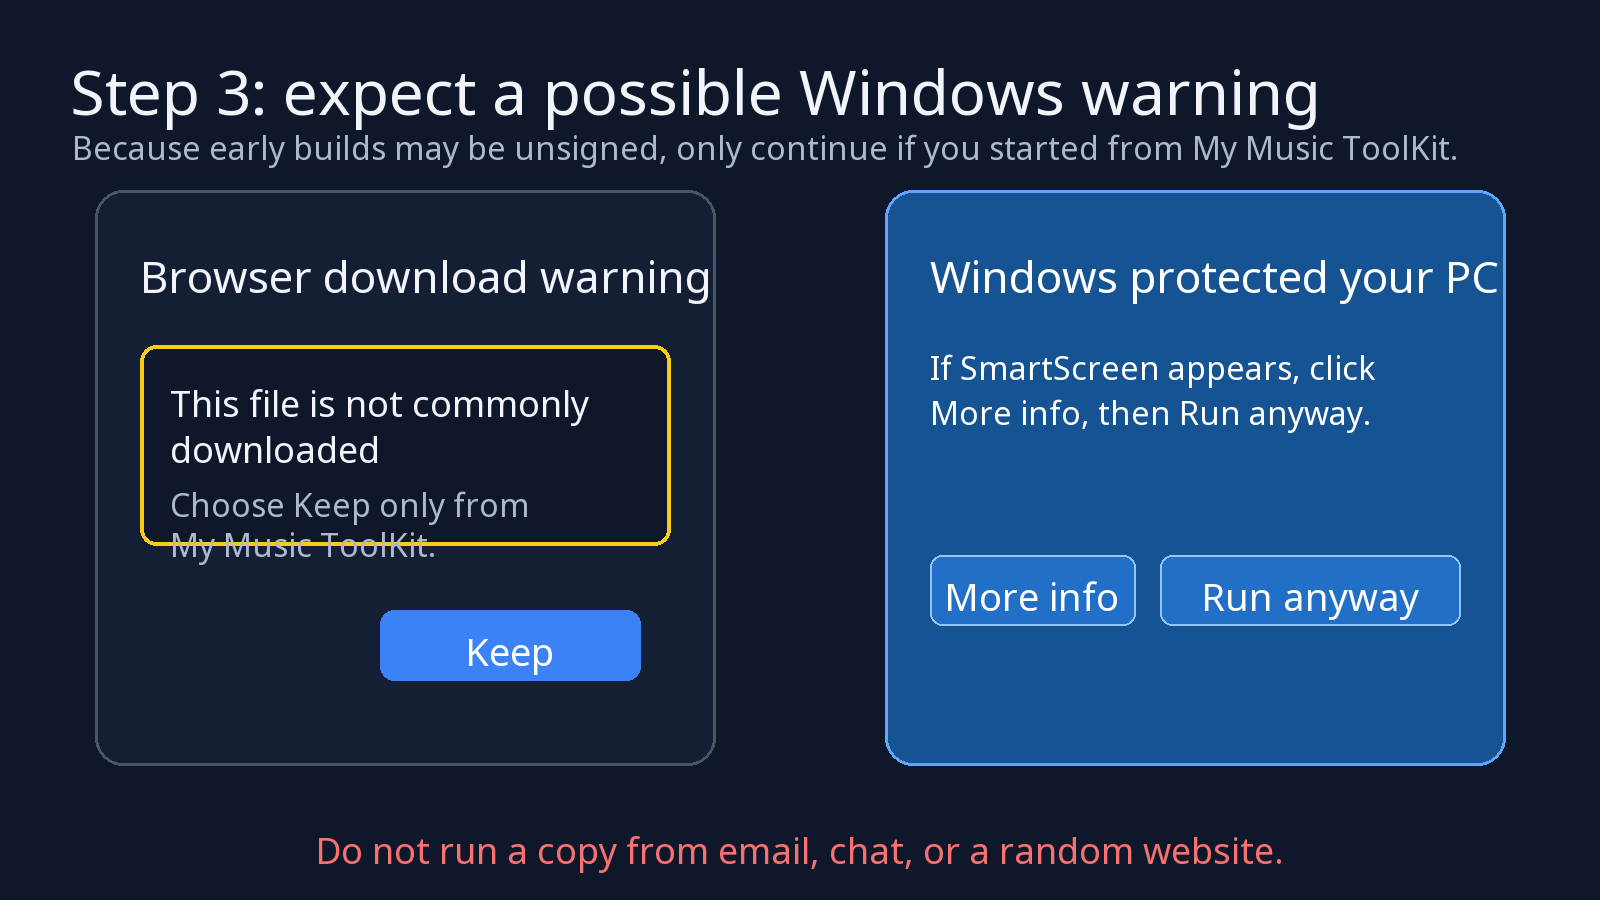
Open the downloaded installer. If your browser says the file is not commonly downloaded, choose Keep only if the download started from My Music ToolKit.
- 4
If Windows shows 'Windows protected your PC', choose More info, then Run anyway only if the installer came from the My Music ToolKit download button. Do not run a copy sent through email, chat, or another website.
- 5
Finish the installer. The Toolkit Engine opens in the background and may show as a small lightning-bolt icon in the Windows tray. If you do not see it, check the hidden tray icons arrow.
- 6
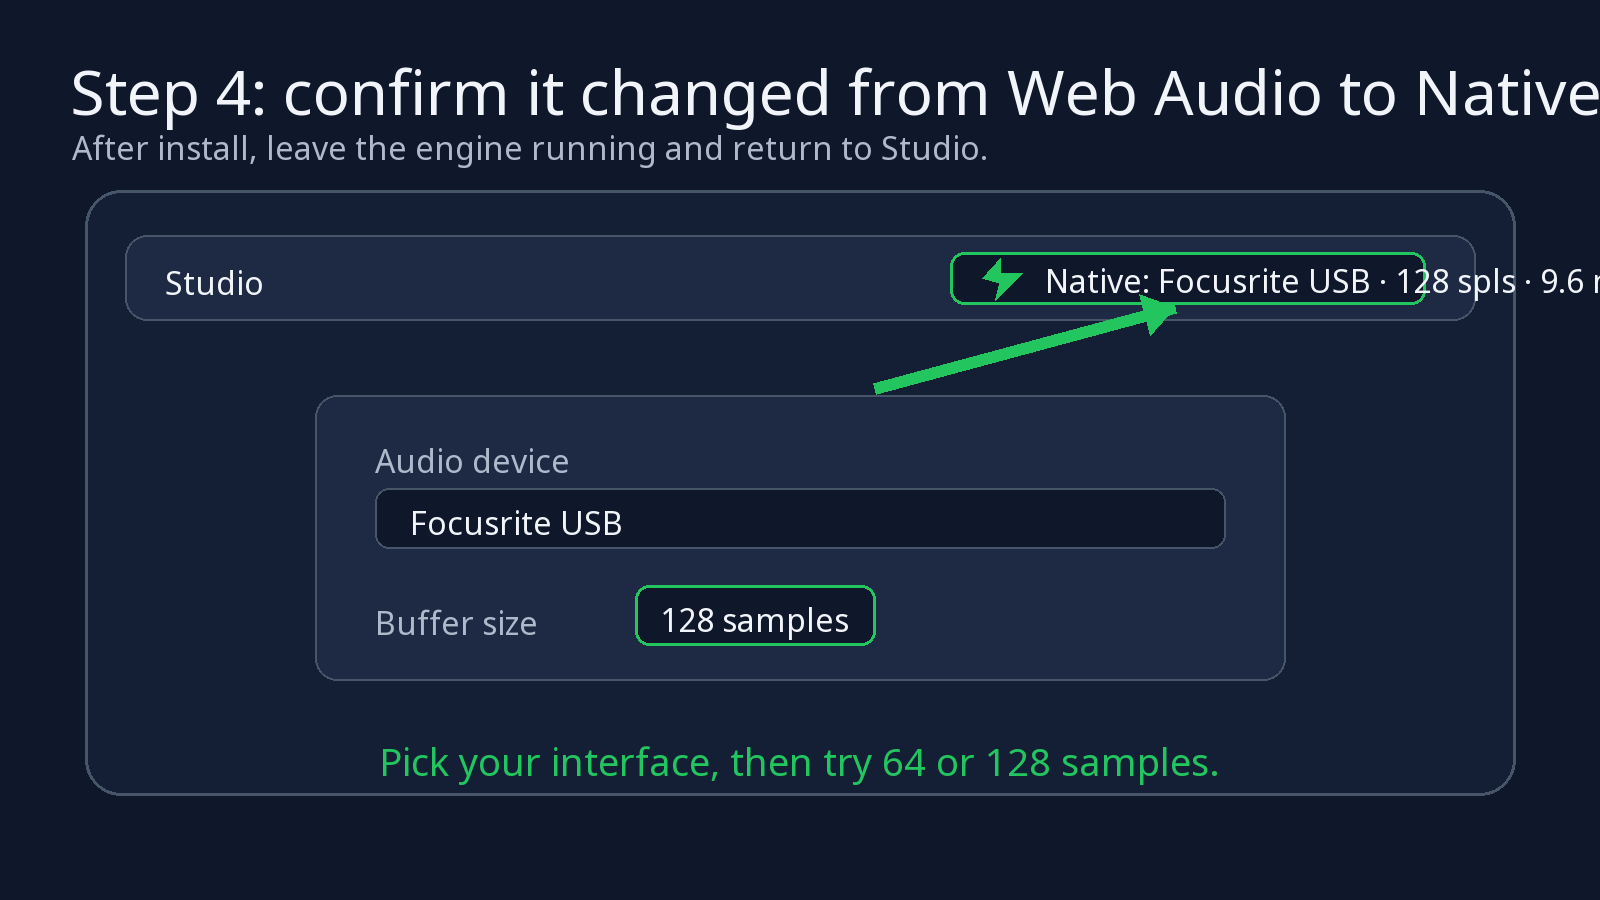
Return to Studio or Writing Room and click Web Audio again. When the engine is connected, the button changes to Native and shows your audio device, buffer size, and delay.
- 7
Choose your audio interface from Audio device, then try 64 or 128 samples for the lowest delay that still plays cleanly.
Tips
- The engine is optional. If it is closed or not installed, the app keeps working with Web Audio.
- The warning is expected on early Windows builds until code signing reputation is established.
- If work antivirus blocks the installer, ask IT to allow My Music Toolkit from the official download link.
Troubleshooting
- The button still says Web Audio after installing — open the Toolkit Engine from the Start menu, then refresh Studio.
- You hear clicks or dropouts — raise the buffer size to 256 samples and try again.
- You do not see your interface — plug it in, install its Windows driver if it has one, then press Refresh in Audio engine & hardware.